
Tools needed are as follows. A sharp pointed craft knife, a #11 blade is good, I use the knife for removing any hanging chads from windows and for helping to remove excess glue before it dries. It is also good for gently pushing the walls into position. You can use a toothpick or fine point glue applicator bottle for adding just the right amount of glue. Toothpicks can also reach into deep spaces to help you adjust the edges of pieces during the glue steps. Bamboo skewers are also a great tool for reaching inside of the buildings to encourage the walls into proper position. Tweezers with slanted, straight across tips, often called eyebrow tweezers, will help you hold onto the very small parts and help with making bends on them. Your finger are the only clamps you will need. Just use them to gently press the parts together until the glue grabs. When gluing paper a small amount of glue is best as you don't want the parts to get soggy. Clear drying, thick, PVA glues work well but choose one that dries water resistant if you wish to decorate the building with paint or glitter. My favorite glue is Crafters Pick "The Ultimate". See the sidebar of this blog for sources on materials such as glue, glitter and tools such as the fine point glue applicator bottle with a .7mm metal tip. I love these applicator bottles, they make the assembly go super fast! A .7mm stainless steel sewing pin makes a great stopper for the metal tip. It is important to only use stainless steel pins as regular pins will rust.
The kit is now available from my Etsy Store
This posting contains the instructions for assembling the little village of 7 miniature paper buildings. The tallest building in this set is 1.25 inches high, that is the church shown on the far left in the photo below. The buildings were designed to use for scenes in dollhouses or inside of ornaments, eggs, domes or simply as decorations in your home wherever you want to place a charming little accent. They are not just for Christmas!

There are three color choices, white, black and gingerbread brown.There is also a micro size, reduced scale version of the kit available in the same color choices. The micro size will also follow this set of instructions. However there has been some simplification of design in the micro version to make it possible to cut the pieces at that size. Building #12 in the micro size does not have a bay window. Building #15 does not have an overlay, fold down, trim at the top of the towers and it also does not have a trim piece that goes over the entry passage.
The White Tiny kits sold prior to September 2015 the larger size, not the white micro kits, have a coated paper with a soft pearl finish that faces the outside of the building. You will need to refer to the photos to make sure you have the folds going in the correct direction.

Instructions for assembling your Tiny Village 2012
This kit is easy to assemble but there are a few basic tips posted in the instructions that may help you.
Each of the buildings is different so be sure to look at the instructions for each building as I will let you know what parts get glued together first.
You may need to use a sharp knife to remove chads from some of the window openings but don't remove the hinged doors.
I have numbered the buildings in the kit to help you build your skills as progress through assembling the various buildings. So lets start with the easiest building #1 where I will give you most of the tips that will make things go even easier.
Please refer to the posting on this blog http://glitterhouses.blogspot.com/2014/03/tips-for-folding-tiny-pieces.html for extra advice on making and handling the folds on some of the very small pieces. As all the fold lines have been perforated they are easy to bend but the micro size kits do best with a bit of assistance from tweezers and such.
BUILDING #1

#1, the barn
TIP
Keep a damp cloth nearby so you can clean your fingers if they get glue on them. That will keep the paper buildings nice and clean.

I am using a toothpick as a glue applicator.
The glue is basic PVA, in this case Elmer's glue, it dries clear.
TIP
The toothpick is a handy tool for nudging walls and other parts into position when things don't line up as you want them to. Also good for removing excess glue. Wipe it off on your damp rag to remove glue from the tip as needed. Use just enough glue to get the job done, you don't want to make the paper soggy.

TIP
I bend all folds lines on this kit completely back against the adjacent sections. This weakens the cardstock on the bend lines making it easier to fit your kit together. Bend all the joints on all buildings before you apply any glue. Test fit the pieces without glue so you feel comfortable with how it is going to go together.

Use a pair of blunt tipped tweezers for a handy bending tool on the very small sections such as doors and chimneys. Try to support small narrow areas next to bend lines such as near doors and windows so that the walls stay nice and straight.

On all the buildings in the kit the walls will rest on top of the section that folds up to form the base.
Glue is applied to the base and up the back wall of the buildings as indicated by the red lines. Be sparing in the use of glue or it will make the paper soggy and take a long time to dry.

Your fingers are the only clamps you will need. Do not hold the buildings by the points that go against the roof as you can bend them out of shape. Be patient, it should take less than a minute for the glue to grip if you are using a slightly thick glue meant for paper.

Center the roof on the building for equal overhangs on each side. Some of the roofs in the kit will be centered by notches on the roof edge but others will be centered like this.

TIP
I glue one half of the roof first, then do the other half.
Congratulations your 1st building is now complete!
BUILDING # 2

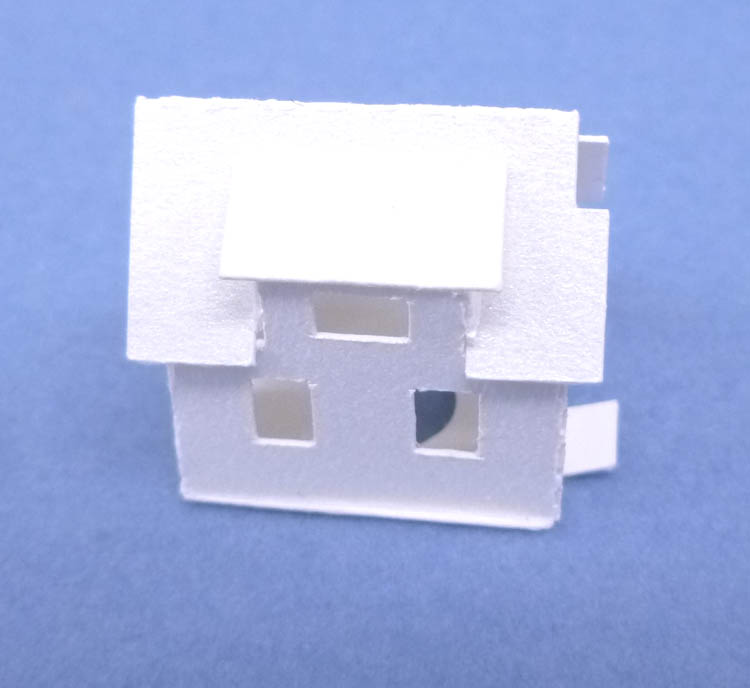
Building #2 is your basic simple house shape, it is put together using the skills you used on building #1 but this time we will add a chimney.

Three parts to this building, the main structure, a roof and a chimney. If for any reason you are missing a part from your kit contact me and I will see that you get that part right away.

Bend all your parts on the fold line and test fit before you add glue.
Same as on building #1 add glue on top of the section that forms the base and up the edge of the back wall.
Use your fingers as a clamp to hold the parts together until the glue grips.

Center the roof side to side and glue it in position.
Remember to use that toothpick to help with removing any excess glue.

This is where that pair of tweezers makes the job of hanging onto and bending a very small part easy instead of frustrating.
Be sure to do a full fold back against the adjacent parts to weaken those bend lines for easier assembly.

The chimney forms a rectangular shape. The narrow side will overlap the longer side at the join between the two sides.
Put the glue along the inside of the join line down inside the chimney using the toothpick as the applicator.
Hold with your fingers until the glue grips.

Put some glue on the bottom edge of the chimney and set it on the roof in the position shown in the photo. Do a visual check see that you got it straight. You will have a few seconds before the glue grips to adjust the position if needed.
Congratulations you have finished assembling building #2
BUILDING #3


Glue goes on the red lines as indicated in the photo.
The join up the tower walls is a butt join, the walls should just touch on the inside corner, they do not overlap each other.
Overlapping the walls at the join will make the building too tight and then the roof won't be able to slip down inside the walls.

A small drop of glue at the bottom of the crenelation is enough to hold the roof in place.
Gently push the roof down until it rest between the notches, it is a snug fit. See the first photo in the instructions for this building to see how the roof looks installed.
Congratulations you have finished assembling building # 3
BUILDING #4

Building # 4 introduces adding a second roof section and also the walls have extra bends to create a bump-out on the front of the building. The main roof on this building has a notch that fits over the bump out. You will be installing the main roof before you install the gable roof over the bump-out.

There are four pieces to this building, the main structure, a main roof, a gable roof and the chimney.

You can work along the base gluing a few of the wall sections in place at a time instead of putting glue the whole length of the base section.

After the walls have dried install the main roof. The notch in the roof will fit down over the bump-out's side walls. Glue the front half of the roof first then the back half.
Glue the smaller gable roof section in place on the front of the building.
Remember to use the toothpick to remove excess glue.

Fold the chimney, glue the join, let dry, then glue it to the roof in the position shown in the photo.
Congratulations, you have finished building #4
BUILDING #5

The assembly steps and glue application are a just little different than on the previous buildings so please take a few moments to look through the steps.


Apply glue as shown in the photo and secure to form the tower into a rectangle. The shorter wall will overlap the edge of longer tower wall. Clamp with your fingers until the glue grips.


Now its time to glue down the rest of the walls.
Apply glue as show by the red lines in this photo.

The main roof has a notch that fits against the tower, glue this half of the roof first.
Next glue the other half of the main roof.

The tower roof is very small, flat tip tweezers really help with making the bends if you grip the paper right by the perforated lines.

Crease all the folds on the tower roof flat.
Use the back of your thumb nail to burnish them flat all the way to the tip of the roof. You can fold and unfold sections until you get each creased burnished flat.

Fold the tower roof into a pyramid as shown and add glue to the inside of the join as shown by the red line in this photo. This is a butt join, the edges of the paper at the corner do not overlap each other, they just touch at the inside corners. Hold the pyramid shape between your thumb and fingers until the glue grips.

Put glue on the top edges of the tower and place the roof on it. Be sure to check and see that the tower roof is sitting straight by looking at it from different sides. You will have a few seconds to make adjustments if needed before the glue dries.
Congratulations, you have finished assembling building #5
Building #6

Building 6 is a small house with an L shaped floor plan.
No new techniques are used on this building so I will keep the instructions brief.

Four pieces make up building #6. The main structure, main roof, gable roof and a chimney.

This is how your building will look before you put the roofs on.

The notch in the main roof fits over the walls. Glue this half of the main roof in place first, then glue the second half.

Glue the gable roof in place.

Fold the chimney into a rectangle and glue. The narrow side will overlap the edge of the wider side at the join.

Front and back views showing where to put the chimney.
Congratulations, building #6 is now complete.
Building #7

There are now new skills needed for this building but do look to see how the main roof is installed.

Four parts for this building. The main structure, dormer roof, chimney and the main roof.

This photo shows how your building should look with the walls bent into shape and glued to the base. The small projection on the base is for the chimney to rest on. Leave the side walls of the dormer spread open in this position so you can slip the roof into place under them.

The roof slides into position under the dormer wings, glue the roof into position.

Using a tooth pick or other small applicator put some glue inside the dormer to secure the side walls
Glue the dormer roof onto the main roof. It should be centered side to side and touch the main roof at the top edge of the dormer roof.

Note that on the first kits I put a small hole to indicate that this side goes against the house. It should be at the lower end of the chimney. My friends who test the assembly of the buildings told me the hole is not needed. So on the more recent kits there is no hole in the chimney.
Now fold the chimeny and glue it into a rectangular tube. When gluing up the rectangle use a butt join without an overlap. Let it dry then glue the chimney to the side of the house.
Congratulations, you have now completed building 7, the last building in your village.
I do have some generalized glitter instructions at the bottom of the post for making the 1:144 Chapel kit. They will give you the guidelines you need for general glittering of your kit. I am presently moving out of my big workshop this month so I am not able to do a photo shoot just for the village kit this next few weeks.
Here is the link to the glitter instructions, just scroll on down to the bottom of the page for the section on glittering. Word of caution paper is not waterproof, so use the glue for glitter sparingly so you don't make a soggy mess of the paper. The same caution goes for painting the paper, don't make it soggy, a little paint goes a long ways. You can use a hair dryer to accelerate dry time.
How to Glitter the Buildings